Install
First install the EVERTims raytracing client, then the auralization engine, and finally the Blender add-on.
First install the EVERTims raytracing client, then the auralization engine, and finally the Blender add-on.
The raytracing client is a C++ standalone: as for today, installing will mean downloading and compiling the sources.
Manual installation:
Download or clone EVERTims source code. Open and compile evert (i.e. lib/libevert/build/macos/evert.xcodeproj) then evertims (i.e. build/macos/evert.xcodeproj) Xcode projects.
Automatic installation:
With a terminal window, go to were you want EVERTims installed and type:
# get EVERTims
curl -sL https://github.com/EVERTims/evertims/archive/master.zip | tar xz
mv evertims-master evertims

# compile EVERTims and EVERT (Xcode)
./evertims/build/build_macos.sh
Check installation: From EVERTims root directory, type:
./evertims/evertims/resources/startEvertims.sh
which should result in the following output:
Material: penkki already in the database.
Initializing new writer. Path pattern = listener_1. Order: 0 - 1048576. Amount: 1048576. Host = localhost:3862
socket      : OK
bind        : OK
socket      : OK
...
Manual installation:
Download EVERTims source code. Compile first the evert library (in evertims/lib/libevert) then evertims itself.
Automatic installation:
With a terminal window, go to were you want EVERTims installed and type:
# get EVERTims
curl -sL https://github.com/EVERTims/evertims/archive/master.zip | tar xz
mv evertims-master evertims

# compile EVERT and EVERTims
./evertims/build/build_linux.sh
Check installation: same place, type:
./evertims/evertims/resources/startEvertims.sh
which should result in the following output:
Material: penkki already in the database.
Initializing new writer. Path pattern = listener_1. Order: 0 - 1048576. Amount: 1048576. Host = localhost:3862
socket      : OK
bind        : OK
socket      : OK
...
(Building)
Automatic installation: download and install the application for your architecture:
Manual installation:
Download the auralization engine source code along with JUCE Grapefruit. Open the .Jucer file located in the root of the auralization engine folder with JUCE, and from there load the project in your IDE for compilation (see the manage your Projucer project page for details).
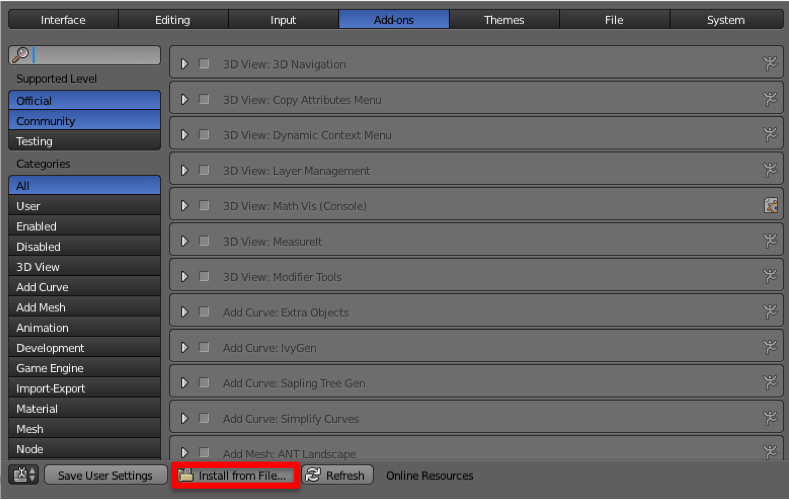
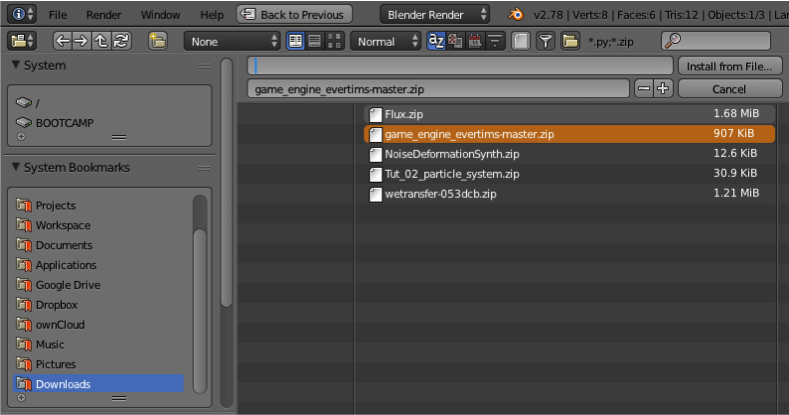
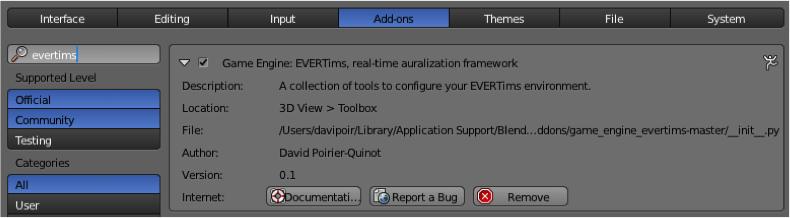
Download and install Blender if need be, then download the EVERTims Add-on. Open Blender preferences, go to the ‘‘Add-ons’’ tab, and click on the ‘‘Install from File...’’ button. in the navigation menu that pops up, locate and double click on the .zip file of the EVERTims Add-on you just downloaded (without unzipping it). Back to the Add-ons tab, search for the EVERTims add-on in the list and enable it:
You should end-up with the add-on nested in the Blender 3D view > Toolbox (press T while hovering the mouse over the 3D view if the toolbox is not displayed):
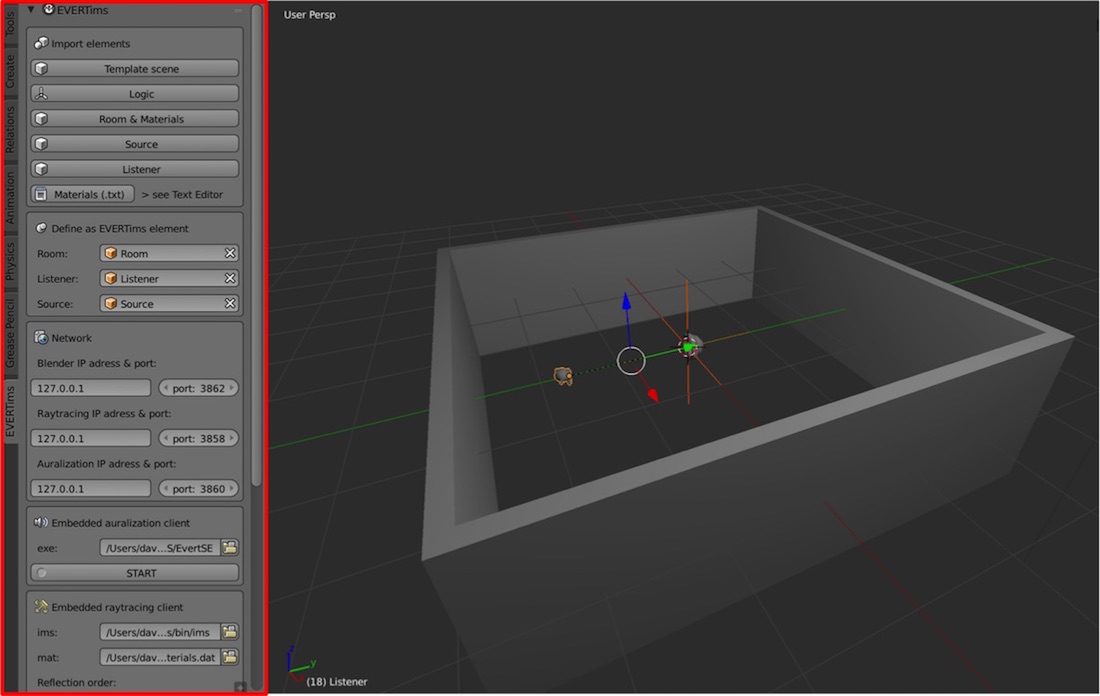
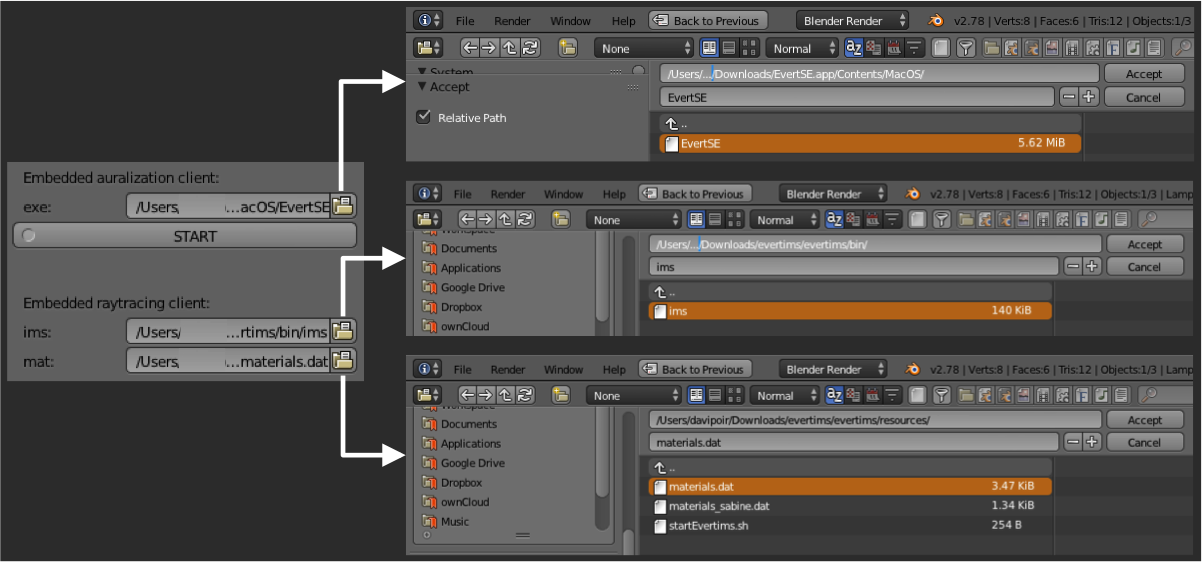
To complete the installation, setup the paths to the “Embedded auralization client”, the “Embedded raytracing client”, and its material file (evertims/resources/materials.dat) in the add-on panel, e.g. on MacOS:
To save these settings once and for all, go to the general Blender User Preferences pannel and click on ‘‘Save User Settings’’. Next, go to the Tutorials section for an introduction on how to use the framework.