Make sure you followed the Blender add-on setup steps before starting the tutorials.

1. Auralization Quickstart

Objective: import default EVERTims assets in a blank Blender scene, start the raytracing client and auralization engine, understand how to work with the framework.

  • Open a new Blender scene
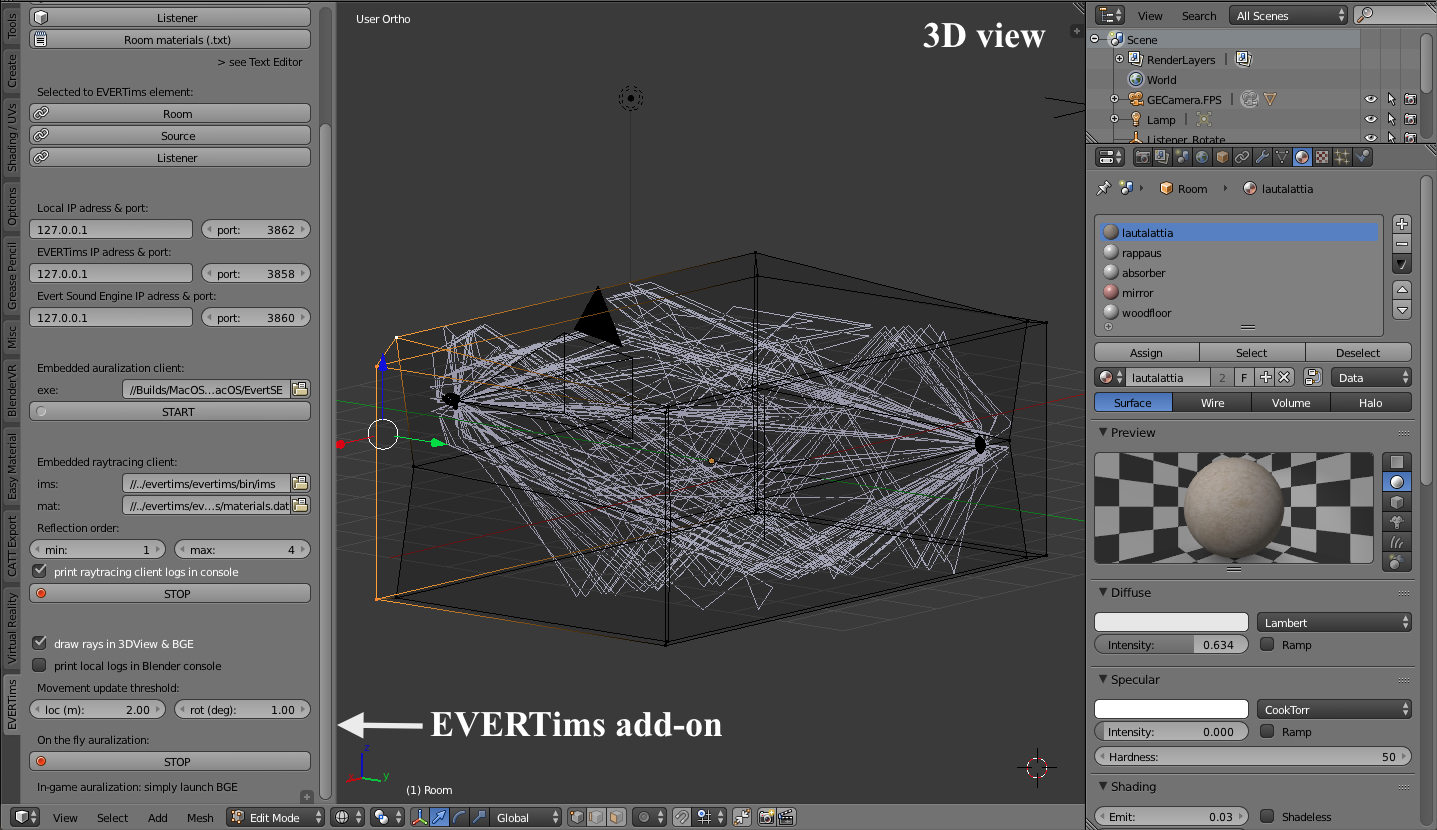
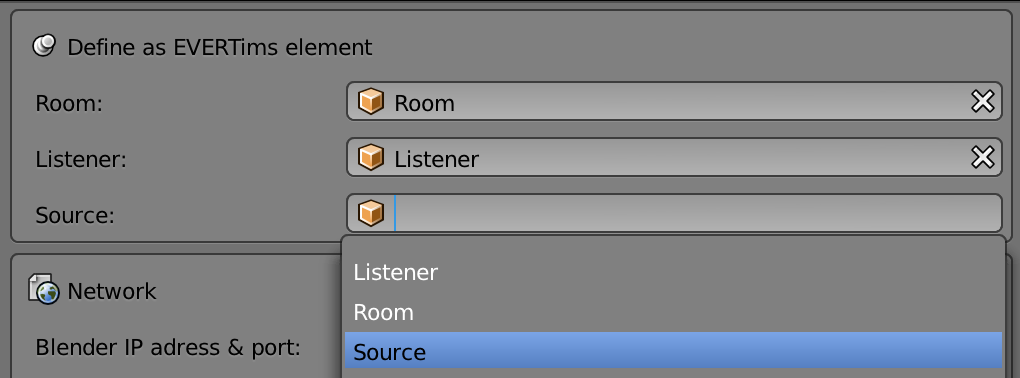
  • in the “import element section” of the EVERTims add-on, click on “Template scene”
  • start the auralization engine (either from Blender or on its own), open a new audio file and start it
  • start the raytracing client from Blender add-on
  • start the “on the fly auralization” from Blender add-on
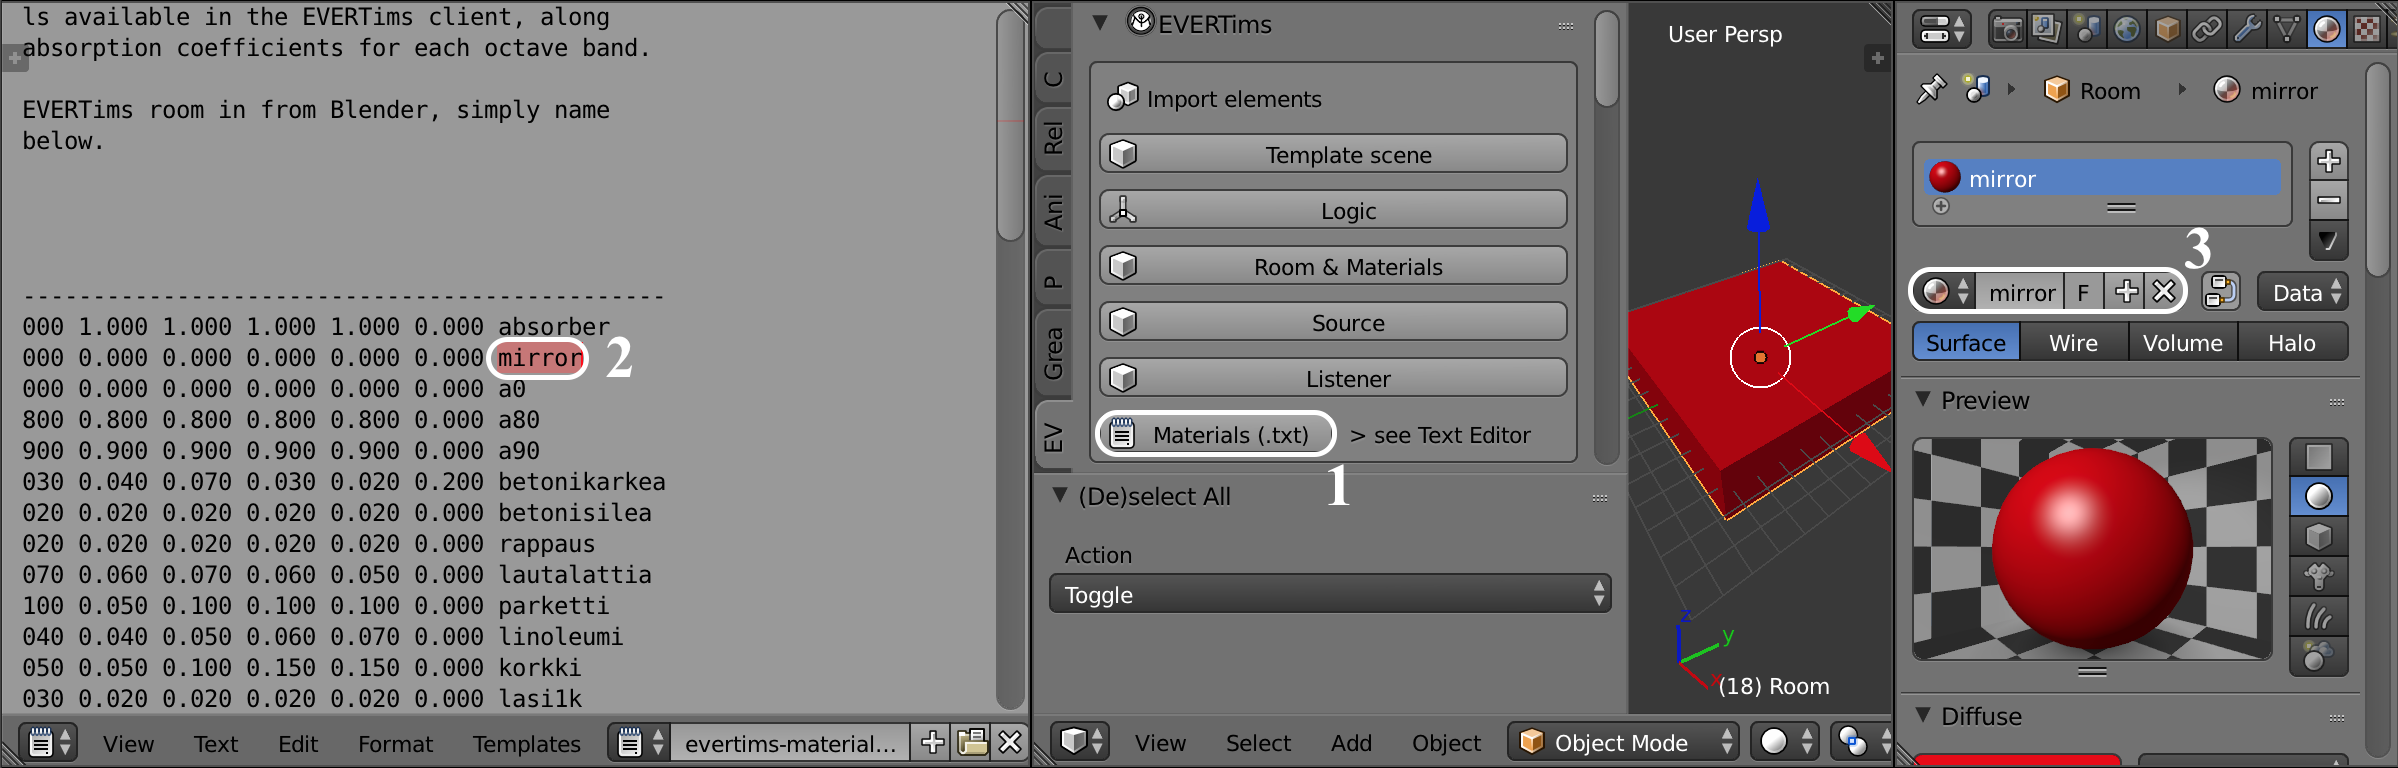
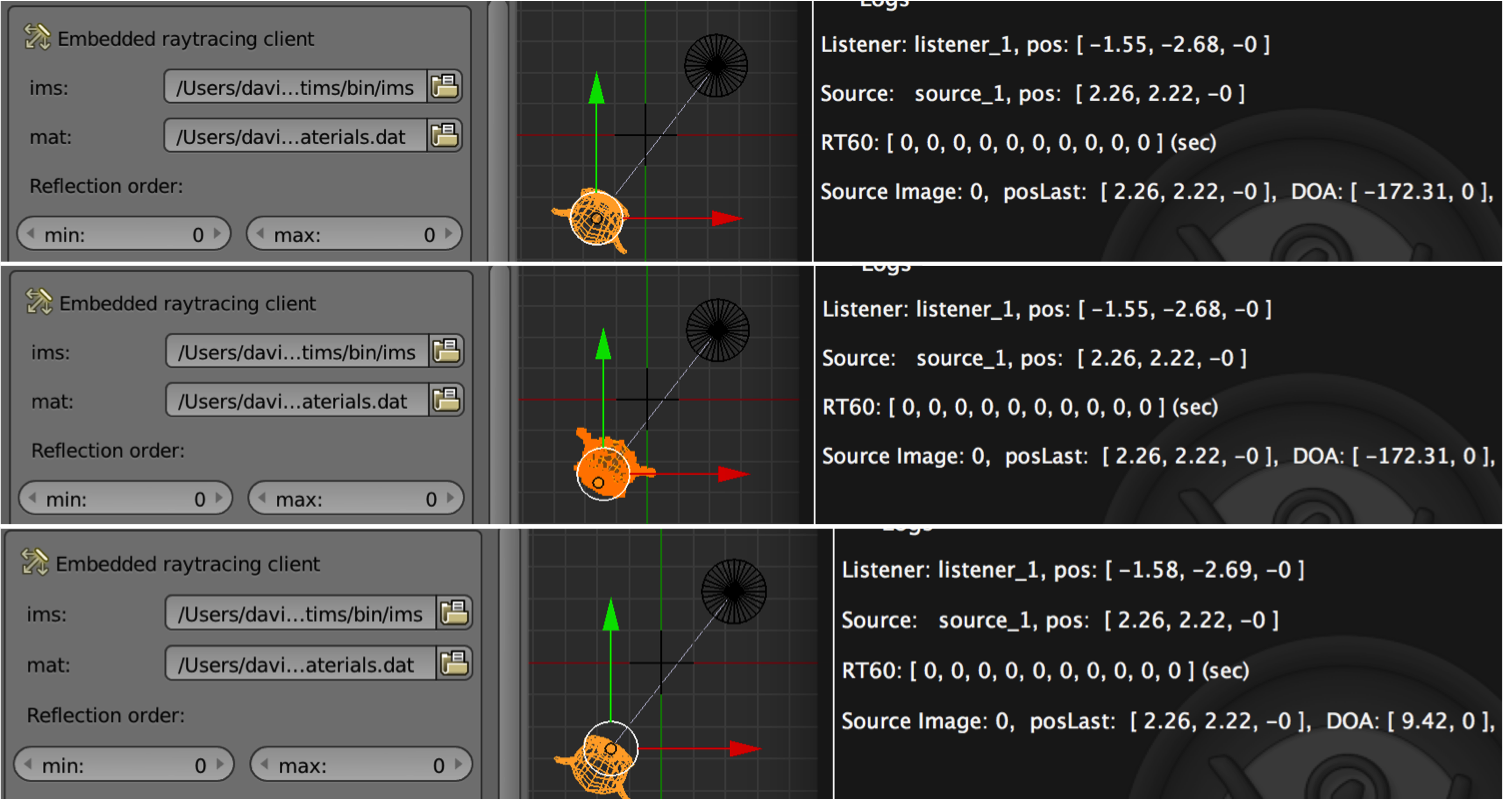
  • in the 3D view, either move listener / source or modify room's mesh / material and listen to the impact of these modifications on room acoustics.
  • stop the “on the fly auralization” and start the Game Engine (pres P with the mouse hovering above the 3D view), use keyboard arrows to move the listener around.


2. Auralization from Scratch

Objective: Create an EVERTims scene without relying on default assets import. Create and setup Room, Source, and Listener. Start an auralization session.

  • Open a new Blender scene, delete everything.
  • Add a Cube (rename it “Room”), a Cone (rename it “Source”), and a Suzanne (rename it “Listener”). You're free to chose different objects types and names.
  • Resize the Room so that it encompasses both Source and Listener.
  • In the EVERTims add-on panel: set the Room, Source, and Listener fields to point towards the newly created objects.

  • In the EVERTims add-on panel: import the EVERTims “Logic” object.
  • In the EVERTims add-on panel: import the Materials.txt file (list of available EVERTims materials, 1 on image below), select a material name (2), and rename the Room material (3).

  • Start the auralization engine, the raytracing client, and the “on the fly auralization” from the add-on. The auralization should be working as in tutorial 1.

At this stage, you'll notice that Suzanne's orientation doesn't match the auralization (left/right inversion). To fix this, rotate the mesh in edit mode (Z:180°), and again in object mode (Z:180°) for Suzanne to face the Source. The DOA (Direction Of Arrival) of the first image-source in the auralization engine should then be close to zero (see figure below).

The same applies to the Source. To fix this, deciding e.g. that the base of the cone should represent the Source's front, use the “Source directivity” option of the auralization engine, setting it to “directional”. Hint: the pattern is a cardioid, loudest when facing forward.